
In this blog post, we will explore the step-by-step process of how to effectively update plugins within the WordPress dashboard.
Thank you for reading this post, don't forget to subscribe!This guide aims to make it easy for users of all skill levels to keep their plugins up to date and ensure their website runs smoothly and securely.
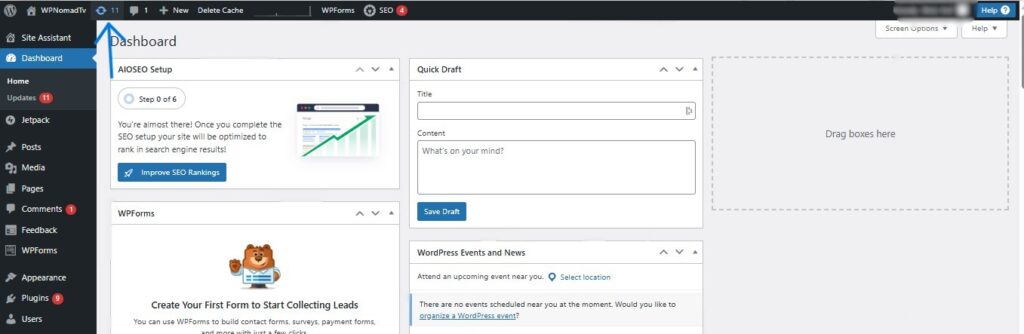
After logging in to your Dashboard, follow the below steps:
Step 1 – Locate the button shown in the picture below
Click the icon to view all pending updates for your website, including any plugin or theme updates required to keep your site running smoothly and securely.
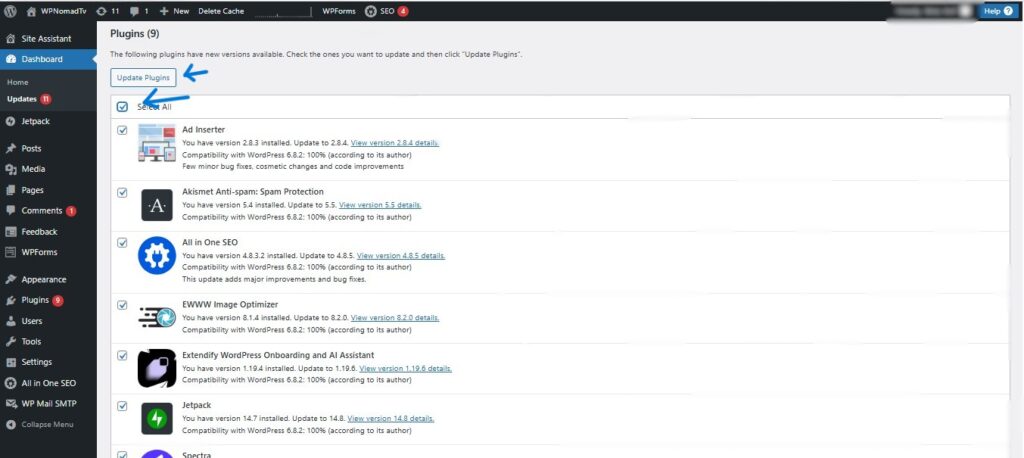
Step 2 – select the plugins to update
You have the option to manually select each plugin that you want to update individually, or you can choose the “select all” option to highlight every plugin in the list.
Once you have made your selection, simply click on the “update plugins” button to proceed with updating all the chosen plugins simultaneously. This allows for a more efficient and streamlined update process.
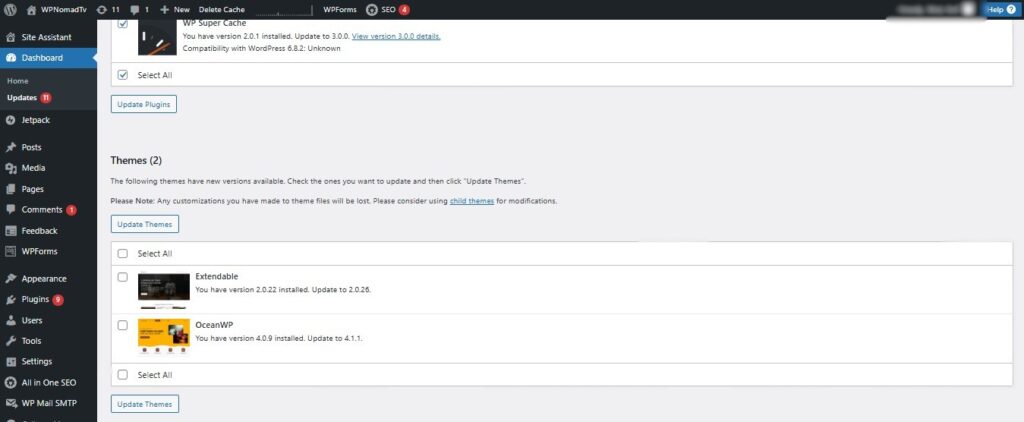
By continuing to scroll down the page, you can also check if any themes installed on your site require updating to a newer version. This allows you to easily identify and manage theme updates in one convenient location.
Themes can be updated in the same manner.
Now that you have successfully updated all the plugins to their latest versions, this is how the page is currently displayed and appears on your screen.

This is a brief guide on how you can easily update plugins in WordPress directly from the website dashboard without any hassle.
Be sure to explore more of our carefully crafted Blogs that are specifically designed to help beginners get started and improve their WordPress skills step by step.