
Welcome to this detailed guide on installing WordPress on DreamHost hosting platform.
Thank you for reading this post, don't forget to subscribe!If you’re looking to build a brand-new wordpress site in 2025, You have come to the right place. DreamHost provides an incredibly streamlined process. This article shows you step by step installation of WordPress in Dreamhost, crafted directly from a visual walkthrough, will ensure you navigate each step with ease and get your website up and running in no time.
Step 1: Adding Your Domain to DreamHost
Before you can install WordPress, DreamHost needs to know which domain you’ll be using. This is the first crucial step in setting up your online presence.
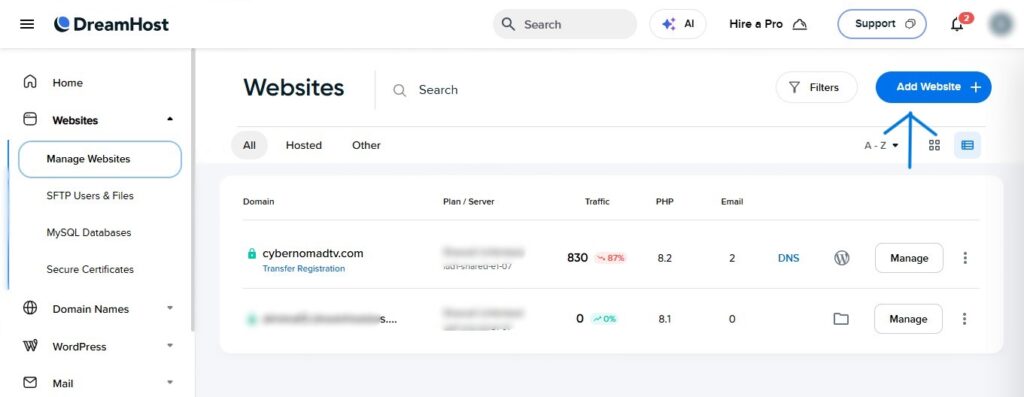
- Navigate to Websites: On the left-hand sidebar of your DreamHost dashboard, locate and click on “Websites.” This will expand you a submenu.
- Manage Websites: Within the “Websites” submenu, click on “Manage Websites.” . This page allows you to manage all of your domains and hosted sites.
- Add Website: Look for the prominent “Add Website” button, usually located in the upper right corner of the “Manage Websites” page. Clicking this will initiate the domain setup wizard.
Step 2: Connect Your Domain to a Hosting Plan
With your domain recognized, the next logical step is to assign it a hosting plan. This tells DreamHost where the files for your website will live.
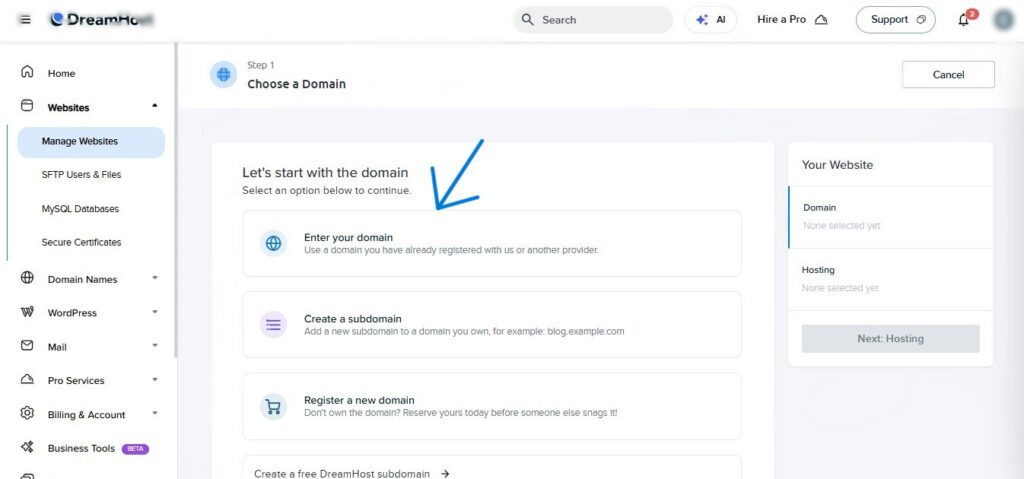
- Choose a Domain (Step 1 of the Wizard): You’ll be presented with a field labeled “Enter your domain.” Type the domain name you want to use for your WordPress site (e.g.,
wpnomadtv.com). It’s important to remember that this domain should either already be registered with DreamHost or another provider. After entering your domain, click the magnifying glass icon to proceed.
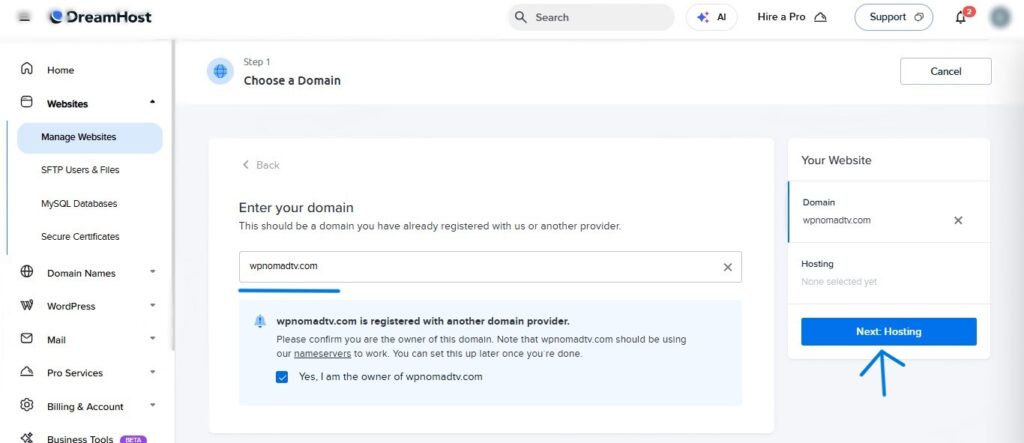
- Confirm Domain Ownership: If your domain is registered with another provider, DreamHost will display a message, such as “wpnomadtv.com is registered with another domain provider.” To continue, you must confirm that you are the legitimate owner of this domain. Check the box that says “Yes, I am the owner of [your domain name].” This step ensures that you have the authority to manage the domain.
- Next: Hosting: Once you’ve confirmed ownership, click the “Next: Hosting” button to move to the next stage of the setup.
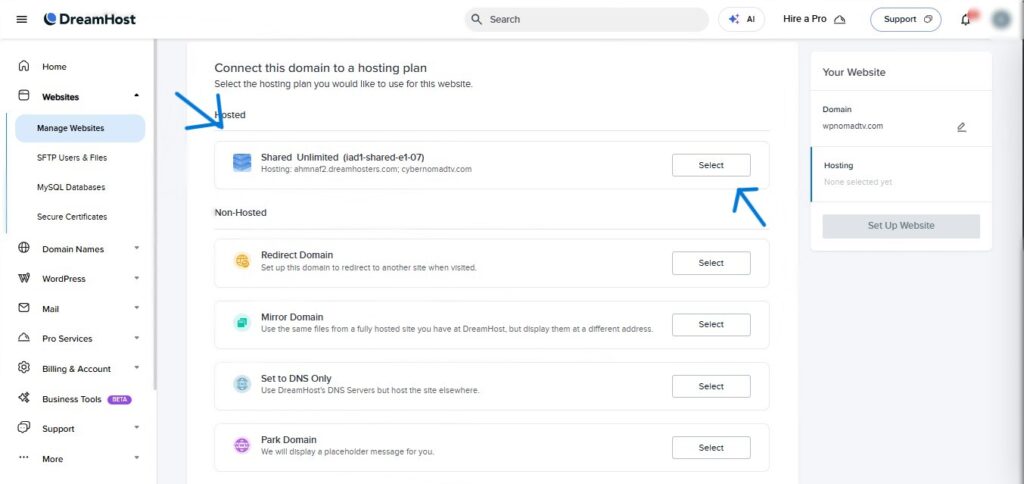
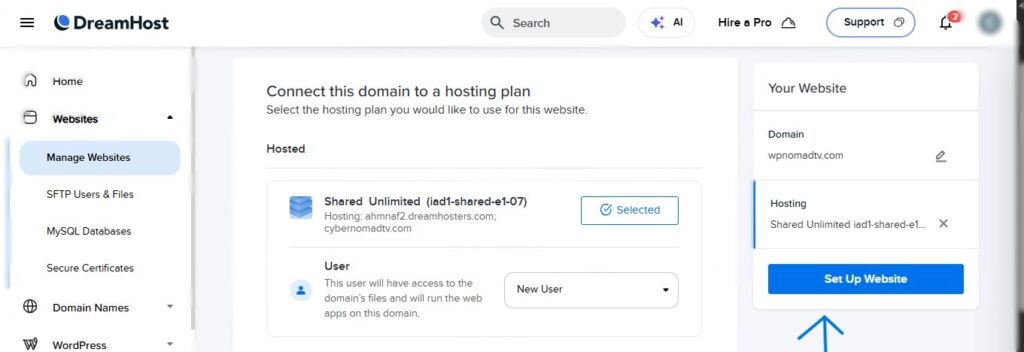
- Connect this domain to a hosting plan: This section presents various hosting options. The most common and recommended choice for new WordPress users is “Shared Unlimited,” often displayed as something like “Shared Unlimited (jadf-shared-e1-07).” This plan typically offers ample resources for a standard WordPress site.
- Select Your Plan: Click the “Select” button positioned next to the hosting plan you wish to use. This action confirms your hosting choice for the specified domain.
Step 3: Confirm Domain Installation
After selecting your hosting plan, DreamHost begins the internal process of associating your domain with the chosen server resources. This typically happens quickly.
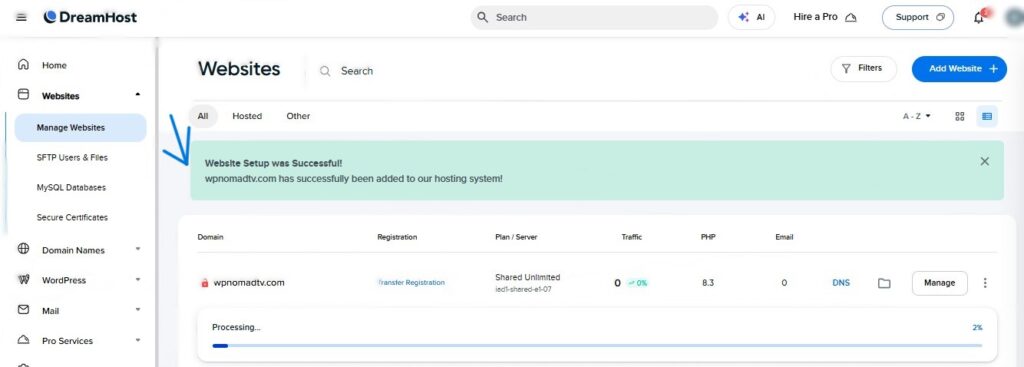
- Website Setup Success Message: You will see a green banner at the top of the “Websites” page, proudly announcing “Website Setup Was Successful! [Your domain name] has successfully been added to our hosting system!” This confirms that the initial domain setup is complete.
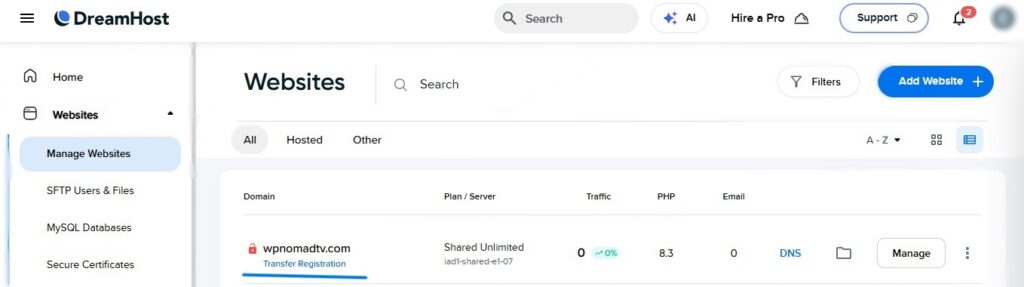
- Processing Status: Below the success message, your domain will appear in a table with a “Processing…” status and a percentage indicator. This signifies that DreamHost is actively configuring the server for your domain. While this usually completes within minutes, it’s a good sign that things are moving forward.
Step 4: Set Up WordPress
Now that your domain is connected and processing, you can proceed with the core task: installing WordPress. DreamHost makes this incredibly simple with their one-click installer.
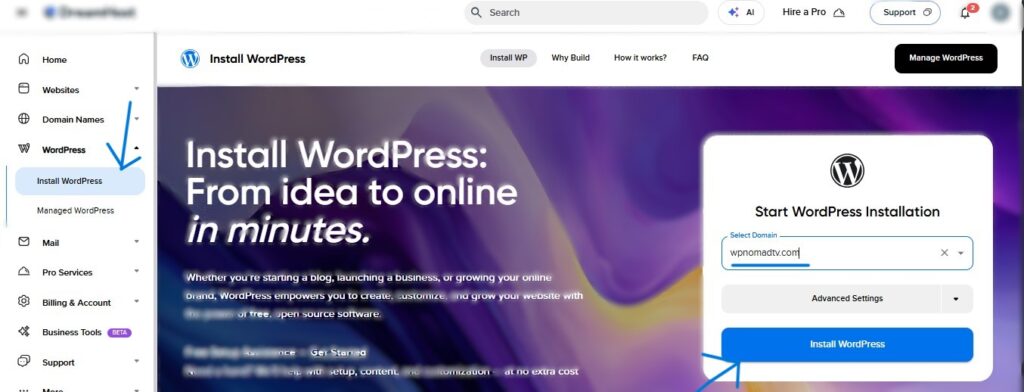
- Navigate to Install WordPress: On the left sidebar, under the “WordPress” section, click on “Install WordPress.” This will take you to the WordPress installation page.
- Start WordPress Installation: On the “Install WordPress” page, you’ll see a section titled “Start WordPress Installation.” Your newly added domain name will already be pre-selected in the “Select Domain” dropdown menu.
- Install WordPress Button: Confirm your domain selection and click on the blue “Install WordPress” button.
Step 5: Choose Your WordPress Experience
DreamHost offers a option of how you’d like to build your WordPress site. This caters to both beginners who prefer a guided approach and those who want more control.
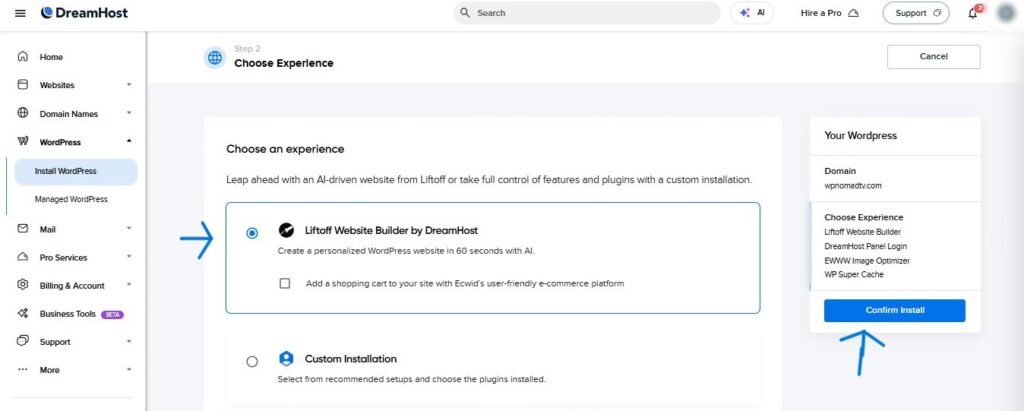
- Choose Experience (Step 2 of the WordPress Installation): You’ll be presented with two primary options:
- Liftoff Website Builder by DreamHost: This is an AI-driven tool designed to help you create a personalized WordPress website quickly. It’s an excellent option for users who want to get a professional-looking site online with minimal effort. It also offers the option to add an e-commerce platform like Ecwid.
- Custom Installation: This choice gives you more control over the WordPress setup, allowing you to select recommended setups and plugins manually. It’s suitable for users who have specific requirements or prefer a more hands-on approach.
- Select Your Preference: Choose the experience that best fits your technical comfort level and website goals.
- Confirm Install: After making your selection, click the “Confirm Install” button.
Step 6: Define Your Website Type
For those who opted for the “Liftoff Website Builder,” DreamHost will ask you to categorize your website. This helps the AI tailor the initial setup and recommendations.
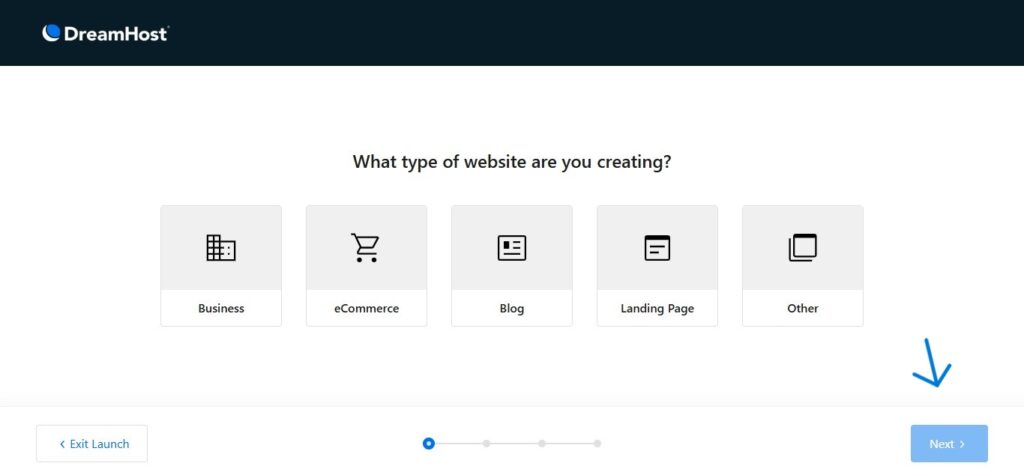
- What type of website are you creating?: You’ll see several prominent icons representing different website types: “Business,” “eCommerce,” “Blog,” “Landing Page,” and “Other.”
- Select Your Category: Click on the icon that best describes the purpose of your website.
- Next: Once you’ve made your selection, click the “Next” button in the bottom right corner.

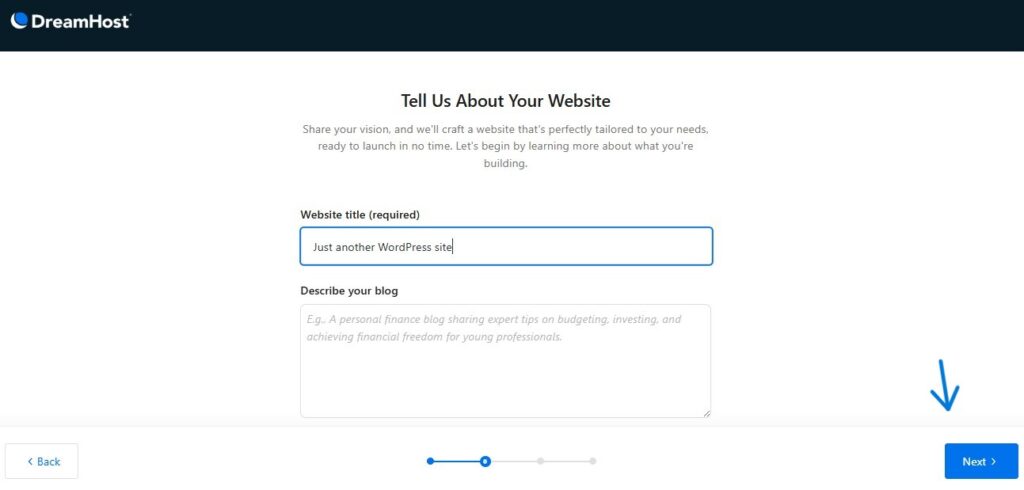
- Next: the builder prompts you to “Tell Us About Your Website.” This image displays input fields for your “Website title (required)” and a space to “Describe your blog” (e.g., “A personal finance blog…”). Enter a fitting title for your WordPress site, which will be the default displayed name. Providing a description helps the AI further understand your site’s focus. Click “Next” when you’re ready.
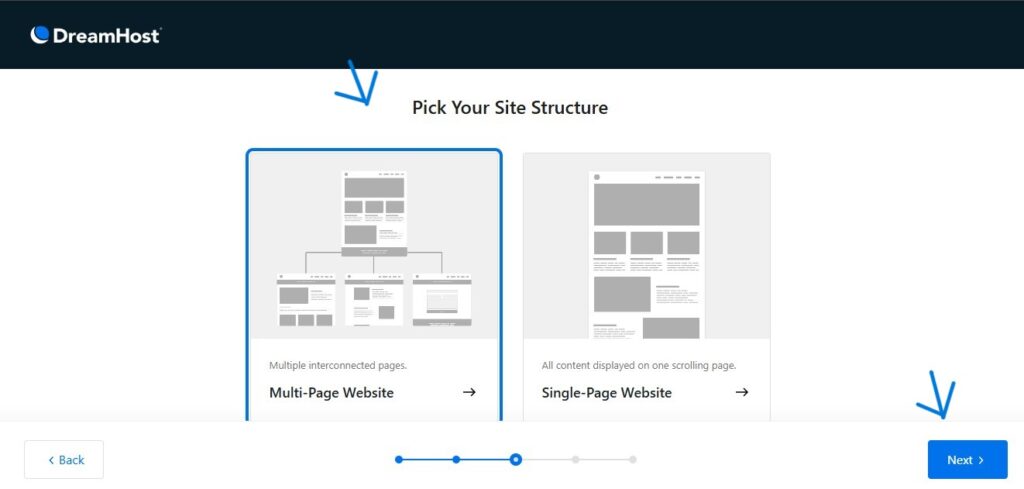
This step, titled “Pick Your Site Structure,” asks whether you want a “Multi-Page Website” (with multiple interconnected pages) or a “Single-Page Website” (all content displayed on one scrolling page). This image shows both options. Choose the structure that best suits your content and user experience goals, then click “Next.”
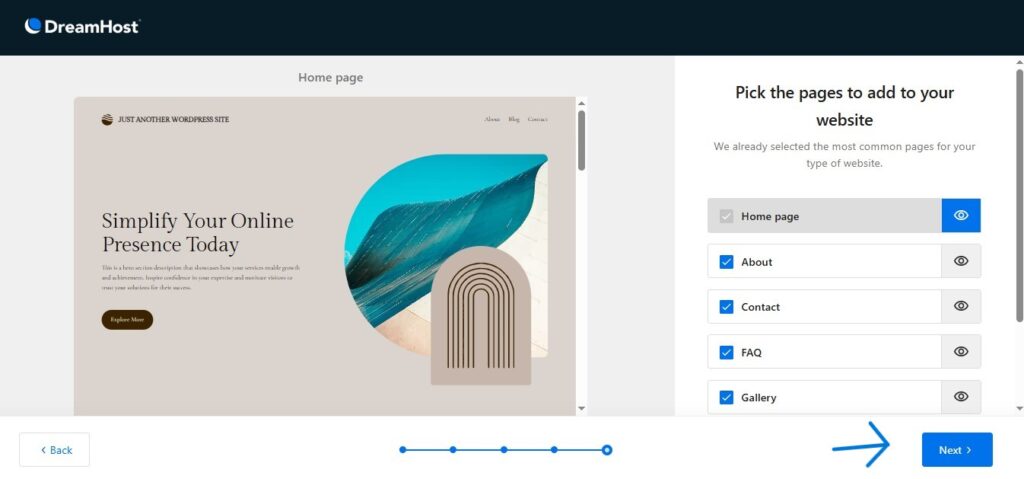
The “Home page” section allows you to “Pick the pages to add to your website.” DreamHost automatically selects common pages for your site type, such as “Home page,” “About,” “Contact,” “FAQ,” and “Gallery,” as seen in this image. You can check or uncheck these options to include or exclude them from your initial setup. Once satisfied, click “Next.”
Step 7: Your Website is Created!
This is the final step! After you provide the needed information, DreamHost will automatically install WordPress on your chosen domain.

- Confirmation Message: A full-screen message will appear, stating, “Your website has been created!” This exciting notification confirms that the installation process is complete.
- Redirecting to Dashboard: Below the confirmation, you’ll see a small message like “Redirecting in 3, 2, 1…” This indicates that you’ll soon be automatically taken to your brand new WordPress dashboard.
Step 8: Explore Your WordPress Dashboard
You’ve done it! You’re now inside the heart of your new WordPress website. The WordPress dashboard is your control center for everything from writing posts to customizing your site’s appearance.
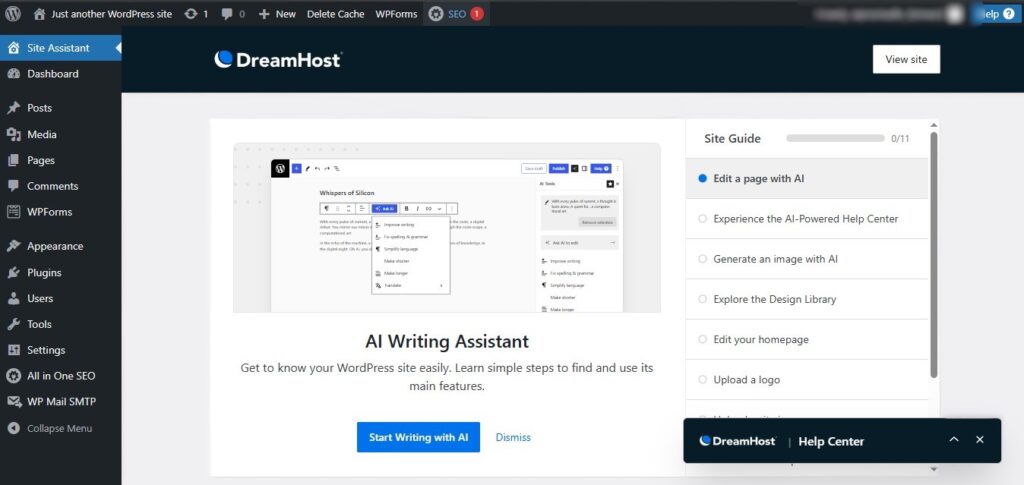
- Welcome to Your Dashboard: The first thing you’ll likely notice is the “Site Assistant” and a “Site Guide” on the right side. DreamHost often provides helpful onboarding elements.
- AI Writing Assistant: A prominent feature you might see is an “AI Writing Assistant.” This tool can assist you with generating content, improving grammar, and simplifying text, making content creation easier for new users. Click “Start Writing with AI” to explore its capabilities or “Dismiss” if you prefer.
- Site Guide: The “Site Guide” will likely walk you through initial steps like editing your page with AI, experiencing the AI-powered Help Center, generating images with AI, exploring the Design Library, editing your homepage, or uploading a logo. These are all valuable resources to get started.
- Left-Hand Navigation: On the left, you’ll find the standard WordPress menu, including:
- Dashboard: Your main overview.
- Posts: For creating blog posts and articles.
- Media: To manage images, videos, and other files.
- Pages: For static content like “About Us” or “Contact Us.”
- Comments: To moderate comments on your posts.
- Appearance: To change your website’s design (themes).
- Plugins: To extend the functionality of your website.
- Users: To manage user accounts.
- Tools: Various utilities for your site.
- Settings: General configurations for your WordPress site.
You’ve successfully installed WordPress on DreamHost! You can now begin adding content, themes, and plugins to make your website your own.
If you need dedicated wordpress installation assisstance, you can contact us. Our team will assist you and perform installation for free.
Note: To avail Free Installation service, you need to activate WordPress hosting from our dedicated deals page
Hosting Platform we assist for installation:
- Shared- DreamHost, SiteGround, A2 Hosting, Hostinger, BlueHost
- Cloud/Managed Hosting- Kinsta, Nestify, CloudWays, WPengine.